Greentech Theme Documentation
Greentech - WooCommerce Responsive Theme documentation by RoadThemes
Thank you for purchasing my theme. If you have any questions that are beyond the scope of this help file, please feel free to email via my user page contact form here. Thanks so much!
| Author: | RoadThemes |
| Contact: | roadthemez@gmail.com |
| Item: | View Demos |
| Current Version: | 1.0.0 |
| Documentation Version | 1.0.0 |
| Created: | 2015-11-08 |
Build Demo
This is a quick guide to help you make your website looks like one of our demo site. All steps in this documentation, please follow this to build demo:
1. Install=>Install Theme and Install=>Install Plugins
2. Create Content=>Sample Content & Create Content=>Widgets
3. Configure Theme, Configure Plugins
4. Create Content=>Menus; Slider; Pages
Install Theme & Plugins
To install this theme, you have to install WordPress first, you can what this Video to know how to install WordPress. Make sure you install WordPress version 3.9 or higher. The minimum version of PHP is 5.2.4 is required (we recommend PHP 5.3+) and MySQL 5.0 to ensure all functions working properly.
You can install this theme like other WordPress themes. Follow these steps below to install this theme. The file name can be different from theme name.
1. Install Theme from Dashboard
Login to your WordPress back end (Dashboard) and follow this video to install this theme.
2. Upload Theme by FTP
Using a FTP software like File Zilla or CuteFTP to upload the theme files to your WordPress site.
The first, extract the theme file "greentech.zip", you will have a folder "greentech" include all theme files and folders (css, images, fonts...).
Upload "greentech" folder to your WordPress folder in this relative path: /wp-content/themes/
After all files are uploaded, Login to Dashboard then go to Appearence - Theme, click on "Active" button of "Greentech" theme to active it.
3. Install Plugins
To install plugins, go to WordPress dashboard and follow this video.
For some plugins like Mega Main Menu, Revolution Slider, Visual Composer, please open the "plugins" folder in the theme package to see plugins file. Extract the zip file for each plugin to get the installable file. Go to Plugins=>Add New to upload & install plugins.
Configure Theme
In this section, we will explain how to configure all features of the Greentech theme in your wordpress store, step by step.
Login to your WordPress dashboard and go to Theme Options, follow these steps below:
1. General
In General tab, we can upload logo images, favicon icon, image for error 404 page. We recommend logo image in .PNG file format for logo image.
For the favicion, use an image in .ICO file format, the image size is 16x16 pixels.

Click on Upload button to upload your image then click on Save Changes. You can do like in this video:
2. Background
In this tab, we can change the background for website. We can use a solid color or upload image and set it as background image.

There are 31 images in folder "sample-data/background" can be used as body background. Please watch this video below:
3. Colors
In this tab, we can change color for theme, watch the video below and select colors like you want:

Please watche the video below:
4. Header
In this tab, we can select header layout, change the mobile menu label, select top menu, show/hide categories menu on home page and inner page...


5. Footer
In this tab, we can enter copyright information, payment icons, newsletter and select menus for footer..

Click on Newsletter to enter form ID

Click on Social Icons to enter your social links

The icons ordering is: facebook, twitter, instagram, tumblr, pinterest, google-plus, linkedin, behance, dribbble, youtube, vimeo, rss. We used icon by FontAwesome http://fortawesome.github.io/Font-Awesome/cheatsheet/
If you need to add more icons, please edit the "theme-config.php", search for "social_icons" then add icon in "options" array:

Click on Contact Us to enter contact information

You can use this sample code for the contact information:
<ul>
	<li class="first"><label>Addresss:</label>123 Pall Mall, London England</li>
	<li><label>Email:</label> info@roadthemes.com</li>
	<li class="last"><label>Phone:</label> (012) 345 6789</li>
</ul>
Click on Menus to select menus for footer

6. Fonts
Click on "Fonts" tab to change font for text, heading, menu. There are some options to select for each font like font family, back up font family, font weight and style, font size, line height, color. We can use default options or change any font like you need.
If we want to restore default options, click on "Reset Section" button. Watch the video below, we change some options then restore default.

Please watch this video:
7. Layout
Click on "Layout" tab, in this tab, we can select page layout is full width or box, select theme preset and turn off the style switcher.

Preset: Iif we select a presets (Preset 2) then the theme uses pre-defined fonts and colors in the preset. If we select "Use Options" then the theme uses fonts and colors from "Colors" and "Fonts" tab.
8. Sidebars
Click on "Sidebar" tab to change position for each sidebar. Just select "Left" or "Right" position for sidebars.

Click on "Save Changes" button to save the changes.
9. Portfolio
Click on "Portfolio" tab to change portfolio columns, projects per page, related projects title.

Click on "Save Changes" button to save the changes.
10. Product
In this tab, we can select shop layout, change number of products per page, product columns, and add enter social sharing code...


For social sharing code, go to http://www.sharethis.com or http://www.addthis.com/ then follow guide on website to create sharing button and get code. Remember to select "website", not "WordPress".
Click "Save Changes" button to save the changes.
11. Blog
In this tab, we can select blog layout, change readmore text and change options for posts carousel.

Click "Save Changes" button to save the changes.
12. Contact map
Click on "Contact Map" tab to change options like shop description on map, upload marker image, enter address or coordinate. Please watch the video below:
Show map: Turn this option to show Google map on contact page
Map height: Enter the height of map in pixels in this text box. The width of map is responsive (100%).
Locate by: This option is used to locate the marker on map by address or by coordinate. If select address, enter your address in "Address" text box. If select coordinate, enter latitude & longtitude values.
Map description: This is the text on marker.
Latitude & Longtitude: These are values for coordinate of marker.
Address: This is map address.
Zoom level: This is map zoom level, higher value will make the items in map bigger.
13. Custom CSS
In this tab, we can add custom css code for website:

14. Less Compiler
This theme use Less technology to compile all theme options with .less files into CSS files

Enable Less Compiler: Turn this option on to make sure all theme options are effected. Only turn it off when you do not change any theme options. When this option is turned off, the theme does not compile .less files, that make server run abit faster.
Configure Plugins
Login to your WordPress dashboard and configure these plugins for the theme
1. Contact Form
Use this plugin to make the contact form on contact page. Navigate to Contact - Contact Forms, there is a form named "Contact form 1", if you want to create a new form, click on "Add New" button.
Click on the form title to edit form, copy this code and paste into "Form" box:
<div class="contact-input">[text* your-name placeholder "Name (required)"][email* your-email placeholder "Email (required)"][text your-subject placeholder "Subject"]
</div>
<div class="contact-message">
[textarea your-message placeholder "Message"]
</div>
<div class="contact-submit">
[submit class:button "Submit Form"]
</div>

Click on "Save" button to save the form.
2. Newsletter Plugin (MailPoet)
Use this plugin to make the newsletter sign up form on footer. Navigate to MailPoet. Click on "Thanks! Now take me to MailPoet." to start using this plugin. Click on "settings"link

On "Basics" tab, enter your email in "Email notifications" and choose other options.
Click on "Forms" tab, there is a form named "Subscribe to our Newsletter", move mouse over it and click on "Edit" link to edit this newsletter sign up form

Move mouse over "Email *" and click on "Edit display" button

Select "Yes" on "Display label within input" then click on "Done" button

Click "Save" button to save changes.
3. WooCommerce
Navigate to Woocommerce - Settings to configure WooCommerce plugin.

We will se a notification to install Woocommerce Pages. Click on "Install WooCommerce pages" button. Now go back to WooCommerce settings.
In "General" tab, you can choose options like you want, no specific option is required for the theme.
In "Product" tab, click on "Display", select a page to display shop page in "Shop Page" dropdown. Set the image sizes like this

Click on "Save Changes" button to save options.
If you see the problem with the product image size on the front end, this because WooCommerce use the old image size. To make WooCommerce display product image in new size, you can use "Regenerate Thumbnails" plugin. Click on "regenerate your thumbnails" link to download this plugin
Download this plugin and save to your local computer. Go back to WordPress dashboard, navigate to Plugins - Add new, click on "Upload" link then click on "Browse..." button to select plugin file (.zip file). Click on "Install Now" button then click on "Active Plugin" link to active the plugin.
Navigate to Tools - Regen. Thumbnails and click on "Regenerate All Thumbnails" button

Go to front end and see product image
4. Products Compare (YITH Product WooCommerce Compare)
Go to YITH Plugins=>Compare

Link or Button: Select this option is "Button"
Link/Button text: Enter the text like "Add to Compare" or "Compare".
Other options is optional.
Click on "Save Changes" button to save options.
5. Wishlist (YITH Product WooCommerce Wishlist)
Go to YIT Plugins=>Wishlist to change settings for the wishlist, we don't require any settings there but we recommend to change text, select social networks.

Check on "Enable YITH Wishlist" checkbox.
Select "Position" is After "Add to cart".
Click on "Save Changes" button to save options.
6. Magnifier (YITH Product WooCommerce Zoom Magnifier)
Go to YIT Plugins=>Zoom magnifier, select options like this


lick on "Save Changes" button to save options.
7. Projects
Go to Pages - Add New to create a new page for portfolio/projects, only enter page title and click "Publish" button.
Go to Projects - Settings, select "Projects Page" in dropdown and click "Save Changes" button. Click on "Images" tab to set image size like this

Click on "Save Changes" button to save settings.
Creating content
In this section, we will explain how to create content for your store, step by step.
To create products and categories for WooCommerce, please go to these links and read documentation:
http://docs.woothemes.com/document/managing-products/
http://docs.woothemes.com/document/managing-product-taxonomies/
1. Menus
Login to your WordPress dashboard, navigate to Appearance - Menus, create menus for this theme. If you are a WordPress beginer, you can read this document to know how to work with Menu.
Before creating a new menu, you can create some pages for portfolio, contact, blog, shop... this will help you create menu quickly.
Primary Menu
Click on "create a new menu", enter menu name is "Primary Menu" and click on "Create Menu" button.
The Primary menu has a complex structure, with many levels of sub-menu. Create your own menu structure by drag and drop to make sub menus.
Please watch the video below and create menus
Now we need active Mega Main Menu for Primary Menu
Click on Mega Main Menu link
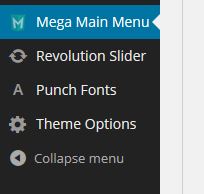
Check on primary & categories then click on "Save All Changes" button.

Click to open Layout Options for primary, topmenu and
Uncheck on "Company Logo" and "Searchbox"

Uncheck on "Sticky"

Now go back to edit Primary Menu
To make a menu item has sub menus in multiple columns, click on menu item to open menu item settings and select "Submenu Type" is "Multicolumns Dropdown", select "Side of Dropdown Elements" and "Submenu Columns".

Note: If you want to put categories, products into mega menu, click on "Screen Options" on left top of page, check on Product Categories. Click to open tab (Products or Product Categories) on left panel. Check on products or categories then click on "Add to Menu" button.

We need to create some other menus like Information, Service for footer... do the same primary menu but with different name and menu items.
For the categories menu, click on "Layout Options: categories" and select Direction: Vertical.
2. Revolution Sliders
This theme include "Revolution Slider" plugin.
Please watch this video to know how to import sample sliders.
After import sliders, you can go to edit slides, change the image, text, animation ... Please read Slider Revolution document before you working on Revolution Slider.
3. Brand Logos Carousel
Go to Theme Options - Brand Logos to make "Our Brands" carousel slider.
Click on "Add Slide" button to add a new logo then click on "Upload" button upload brand logo image. We recommend the logo image size is 185x105 pixels. We can add Title and Link to a logo.


Click on "Save Changes" button to save the slider.
4. Sample Content
We can import content for projects, contact form, testimonials
Login to your WordPress dashboard, navigate to Tools - Import. Click on WordPress link on the table then click "Install Now" button on popup window to install WordPress Importer.

Click on "Activate Plugin & Run Importer" link to begin

Click "Browse..." button and select XML file in "sample-data/exported_files" folder:
- all-content.xml: This is exported of many content, includes posts, pages, products, contact form, testimonials, menus. You can ignore this file if you website has already content.
Click on "Upload file and import" button

On the next interface, select existing user on dropdown, check on "Download and import file attachments" to download sample images.
Click on "Submit" button to import.
All the content blocks are for sample, after importing finished, you have to edit them. Go to Content Blocks menu to see all, click on each block to edit.
5. Widgets
To create widgets for this theme quickly, we use a tool to import all widgets from exported files in "sample-data/exported_files" folder.
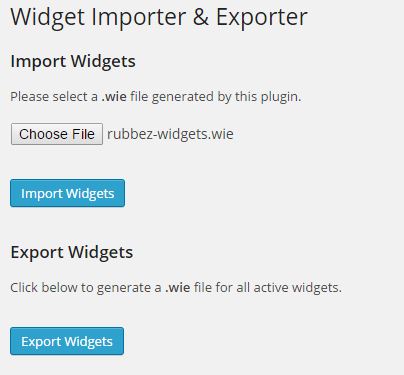
Login to your WordPress dashboard, navigate to Tools - Widget Importer & Exporter

Click on "Browse..." or "Choose File" button then select "Greentech-widgets.wie", click on "Import Widgets" to finish.
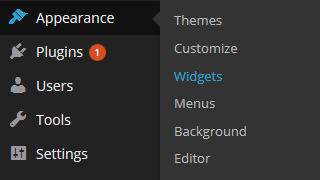
After importing widgets, we need go to update some widgets like menu, slider. Go to Apperances - Widgets
6. Create Pages
In this guide, we will create some of pages for your store like home page, blog page, shop page, about us page, contact page...
6.1 Home Page
The default home page is blog, to create a home page with layouts of this theme, we have to create a new page and set it as front page.
Go to Pages - Add New, enter page title and select template is "Front Page Template"
For the page content, open "sample-date/pages" folder in this package, open a "home-[page name].txt" and copy content. Click on "CLASSIC MODE" and click on "Text" tab to switch to HTML mode, paste content there and click Publish to save page.
Go to Settings - Reading, select "A static page" in "front page displays" then select your page in dropdown.

Click "Save Changes" to save.
6.2 Blog Page
This theme includes 3 layouts for blog page (Full Width, None Sidebar, Sidebar). Login to your Dashboard and create a new blank page.
Select blog layout from Theme Options. Go to Settings - Reading, select your page in "Post page" dropdown.
6.3 WooCommerce Pages
We have to create pages for WooCommerce (shop, cart, checkout,wishlist). When you installed WooCommerce plugin, you will see this button in Dashboard.

Click on "Install WooCommerce Pages" button to install.
6.4 Contact Page
We use the Contact Form 7 to make contact form on the contact page. To get contact form shortcode, navigate to Contact - Contact Forms you will see the form shortcode, copy it to paste into contact page. Select page template is Contact Template
6.5 About Us Page
To create About Us page, navigate to Pages - Add New, enter the page title and select page template is About Us.
Open "sample-date/pages" folder in this package, open a "about-us.txt" and copy content. Click on "CLASSIC MODE" and click on "Text" tab to switch to HTML mode, paste content there and click Publish to save page.
7. Shortcodes
In this theme, we use Shortcodes Ultimate plugin to make shortcodes. You can go to this page http://gndev.info/kb/ and read the documentation to create your own shortcodes.
Credits & sources
I have included these sources with this theme:
jQuery: http://jquery.com/
FlexSlider: http://flexslider.woothemes.com/
Slick: http://plugins.jquery.com/slick/
jQuery Gmap: http://labs.mario.ec/jquery-gmap/
FancyBox: http://fancyapps.com/fancybox/
jQuery Parallax:http://www.ianlunn.co.uk/plugins/jquery-parallax/
jQuery Shuffle: http://vestride.github.io/Shuffle/
Font Awesome: http://fortawesome.github.io/Font-Awesome/
lessphp: http://leafo.net/lessphp
Once again, thank you so much for purchasing this theme. As I said at the beginning, I'd be glad to help you if you have any questions relating to this theme. No guarantees, but I'll do my best to assist. If you have a more general question relating to the themes on ThemeForest, you might consider visiting the forums and asking your question in the "Item Discussion" section.